Setting up Authwave for the first time
The first thing to do when setting up Authwave is to build something worth logging in to. Get your pages working, put some data on the screen, and spend time on the features your users will actually come for. Authentication can wait while you work out what your application needs to do.
Start with your application
The first thing to do when setting up Authwave is to build something worth logging in to. Get your pages working, put some data on the screen, and spend time on the features your users will actually come for. Authentication can wait while you work out what your application needs to do.
You'll probably still need the idea of a user. A shopping list needs an owner; a dashboard needs someone whose data it can display. During local development, that person can be identified by a made-up ID. You can build the relationships in your database and try out different screens without creating a registration form first.
Sometimes it's useful to let yourself choose the ID. Use AAAAA for your test administrator, 11111 for one user and 22222 for another. Switching between them lets you see how the same application behaves for different people, without logging in and out all afternoon.
Keep this shortcut confined to development, of course. A visitor choosing an ID is useful when you're testing with dummy data, but it doesn't prove who they are. Before real users or private data are involved, replace that shortcut with authentication. Until then, you can concentrate on getting the application right.
Local authentication is a few clicks away
When you're ready to try a real login, your application can stay on your computer. There's no need to deploy it just to find out whether signing in works.
In the Authwave control panel, add a development deployment to your application and configure its return address for your local environment. After authentication, Authwave can send you back to your application on localhost, ready to continue where you left off.
You can keep your development-only demo login alongside this integration. That means you can test the full authentication journey when you're online, then carry on building features in a café or on the train without a connection. You don't need to run your own copy of the provider locally just to work on a dashboard.
Think about where authentication belongs as you build. Someone reading a public page may not need an account at all. Someone opening their own dashboard does. Knowing which actions need an identified user gives you a clear place to introduce login.
Connect your provider
The provider is the software that handles authentication and its administration. It gives people somewhere to sign in, while your application gets on with the work it was built to do.
Sign in with your administrator email address at login.authwave.com, or open the admin control panel on your own self-hosted instance. Create an application, give it a recognisable name, and add a development deployment with the local return address you want to use.
Copy the deployment's client key into your application's server-side configuration. This connects your application to its Authwave deployment; keep it private, just as you would any other secret used by your server.
Install the client library
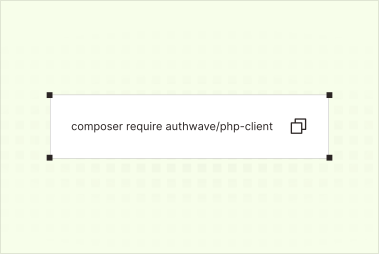
For a PHP application, install the client with Composer:
composer require authwave/php-client
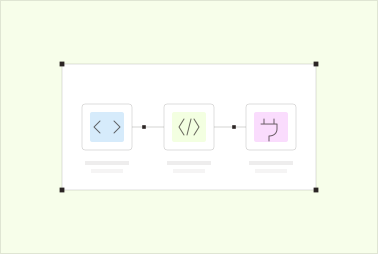
The examples here use PHP, but the same arrangement applies when integrating with another language or framework: configure the client, start the login journey when needed, and use the authenticated identity when the user returns.
Once Composer's autoloader is available, create the authenticator early in your request handling:
$auth = new Authwave\Authenticator($clientKey, $currentUriPath);
Here, $clientKey comes from your private configuration and $currentUriPath is the path of the current request. Creating the authenticator before rendering your page gives the client a chance to handle the authentication response when someone returns from the provider.
When someone chooses to sign in, start the login journey with:
$auth->login();
After authentication, your application can retrieve their identity:
$authUser = $auth->getAuthUser();
The returned AuthUser contains their ID and email address, available as $authUser->id and $authUser->email. Use the ID to associate that person with a record in your application's database. On their first visit, you can create the application record; on later visits, you can load the existing one.
There's a small naming detail here: the client calls this class AuthUser because your application may already have a User class of its own. One represents the authenticated identity, while the other can hold whatever your application needs, such as preferences, projects or account permissions.
Authentication establishes who someone is. Your application still decides what they're allowed to do, so keep your permission checks around private data and actions.
For a fuller PHP example, including checking login state and signing out, see the PHP client repository.
Choose your login address
By default, users visit login.authwave.com to authenticate. You can also configure a domain of your own, such as login.mycoolapp.com, so the address feels like part of your application.
If you're self-hosting, choosing and configuring that address is part of setting up the provider. Whichever option you use, pair it with a clear application name. Someone following a sign-in link should be able to recognise where they've arrived and which application they're signing in to.
Keep your configuration private
The deployment key belongs on your server. Load it through your application's private configuration or environment variables, and keep real values out of source files committed to a public repository.
The same applies when sharing an example or asking for help. Replace keys before posting configuration snippets, and check screenshots for values you didn't mean to include. Browser code is visible to visitors, so it isn't a suitable place to store the secret either.
Use the key for the deployment you're working on. When you add a production deployment, configure it separately so your local setup can continue pointing at your development environment.
Check the return journey
A successful login should bring someone back to something useful. If they started from a particular project or dashboard, returning them there saves them having to find their place again.
Configure the return path in Authwave, then make sure your application handles authentication on that path before deciding what to display. Keep any onward destination under your application's control: a return address supplied by a visitor shouldn't allow an arbitrary redirect to another website.
Try the less tidy journeys too. Someone might cancel halfway through, return in another tab, or sign out and then open a bookmarked private page. Give them a clear way to continue, and check permissions on each request for private data. Hiding a dashboard link doesn't protect the dashboard itself.
Make login feel familiar
Start with your application's logo and colour scheme. Those small details help people recognise the login page and feel comfortable continuing.
You can take the styling further with your own CSS, bringing buttons, spacing and other interface details closer to the rest of your application. There isn't much interface to dress up, which makes it quite manageable to get the two feeling consistent.
Keep the flow easy to use as you customise it. Concise labels, readable text and visible keyboard focus all help people move through it. Try it on a small screen, navigate without a mouse, and check that your colours remain readable in the colour schemes you support.
The aim is for signing in to feel like a natural part of using your application. People should recognise it, complete it, and get back to what they came to do.
Keep the next steps simple
Before launch, walk through the complete journey with a new account and a returning user. Try an unsuccessful attempt and a cancelled login, then sign out and confirm that private pages and data are no longer available.
Check what happens after a first login too. Does the new user get an application record? Do they arrive somewhere helpful? Are their initial permissions correct? Your account settings and privacy information should be ready for them alongside the sign-in flow.
Once those pieces are in place, you have a working connection between your application and Authwave, with a login journey you've tried from beginning to end. You can keep developing locally in the same way, adding real authentication wherever a feature needs it.
If you'd like to explore the provider itself or run your own instance, the source is available in the Authwave provider repository.