Your first Authwave integration
Before adding authentication, get your application doing something useful. A dashboard with sample records or a project page with dummy data gives you somewhere concrete to return to after login. You can use a development-only test identity while working on those features.
Start with a page worth returning to
Before adding authentication, get your application doing something useful. A dashboard with sample records or a project page with dummy data gives you somewhere concrete to return to after login. You can use a development-only test identity while working on those features.
Choose the first action that needs a real identity. Reading a public page may not require an account, while opening a private project does. Starting with one protected part of the application makes it easier to see what the integration needs to achieve.
Think through the journey from that page: what prompts someone to sign in, how they reach the provider and where they should return. Cancellation and sign-out belong in that plan too, particularly when someone began from a bookmarked private page.
Register the application
In the Authwave control panel, create an application with a name people will recognise. Add a development deployment and configure the client address and return path for your local application. You can test the integration on localhost before deploying the application anywhere else.
The provider handles authentication; your application uses the resulting identity. You can use the hosted provider or your own instance without changing that division of responsibility.
Choose the login address
Decide which address people will visit to authenticate. A recognisable application name and a familiar login address help the change of page make sense. If you use a domain such as login.example.com, complete its DNS and HTTPS setup before asking people to use it.
The PHP client defaults to the hosted login address. For a provider on another hostname, supply that hostname through the constructor's authwaveHost argument. Keep this setting alongside the deployment key so it is easy to see which provider a deployment uses.
Store the client key privately
Copy the development deployment's client key into your server-side configuration. It belongs with the settings your server reads, rather than in browser code or a source file committed to a public repository.
Use different configuration for development and production from the beginning. This lets you keep testing locally without changing the provider connection used by real accounts.
Connect the PHP client
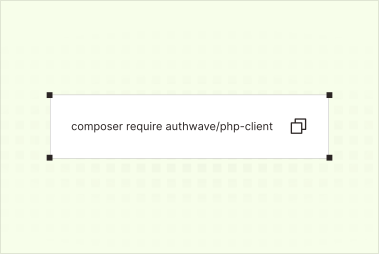
Install the library through Composer:
composer require authwave/php-client
Your application can keep its existing framework, routes and templates. The client needs a session and an opportunity to handle the request before page output begins.
If your application already starts a PHP session, use that session. Otherwise, start one in the early request handling, then construct the authenticator after loading Composer's autoloader:
use Authwave\Authenticator;

require __DIR__ . "/vendor/autoload.php";

if(session_status() !== PHP_SESSION_ACTIVE) {
    session_start();
}

$auth = new Authenticator(
    clientKey: $clientKey,
    currentUriPath: $_SERVER["REQUEST_URI"],
);
Here, $clientKey is the value loaded from your private configuration. The current request address lets the client process the authentication response when the browser returns. Place this setup on the return route as well as the page that begins login, or in shared request handling used by both.
Creating the authenticator can cause a redirect while it completes authentication, so it needs to happen before rendering the page or sending other output.
Start login from an application action
Connect your application's sign-in action to:
$auth->login();
The client sends the browser to the provider and handles the return exchange. Your application doesn't need its own registration, email verification or password recovery forms to complete that journey.
Try it with an email address that hasn't used the application before. Authwave begins signup and login at the same screen, so a new user can follow the instructions without first choosing a registration page. Then repeat the journey with the same account to see how it works for someone returning.
Use the authenticated identity
On the return request, check the login state before asking for the identity:
if($auth->isLoggedIn()) {
    $authUser = $auth->getAuthUser();
    $ownerId = $authUser->id;
}
The identity provides the authenticated ID and email address. Use the ID to find the associated account in your application database, creating that application record on the first visit where appropriate. The email address can change, so it shouldn't be the only connection between someone's authentication identity and their existing records.
Your own user model can continue to hold preferences, memberships and other application data. AuthUser describes the identity returned by the provider; it doesn't need to replace that model.
Check access before loading private data
Authentication answers which identity is making the request. The application still needs to check whether that identity can open a particular project or perform an action.
If a request includes a project ID, look up the project together with the user's membership or ownership. Don't assume that being signed in gives access to any project whose address can be guessed. Apply the check to requests for data and changes as well as the page that displays it.
This is a useful first integration test: sign in as one account, open its project, then try the same project address from a different account. The result should follow your application's permission rules.
Join up the return journey
Bring someone back to the page that prompted login where possible. If the application remembers an onward destination, keep that destination within routes it controls, rather than accepting an arbitrary external address supplied in a request.
Handle cancellation without losing the person's place or leaving them at a page that assumes authentication succeeded. Give them a clear way to continue on public pages or try signing in again when the next action requires it.
Try sign-out too, then open the private page directly and repeat any request it uses to load data. A hidden link is only a navigation choice; the request itself still needs to reject access when the person is no longer authenticated.
Prepare the same journey for production
Once the connection works, add the application name, logo and colours that people should see during authentication. Check email-code login alongside the password route, and try both a new account and an existing one.
Create a production deployment with its own key and HTTPS return address when you're ready to launch. Repeat the journey in that environment so configuration differences are caught before other people encounter them.
The application code has a small set of responsibilities: start authentication, check the returned state and associate the identity with the right records and permissions. The first-time setup guide covers the surrounding configuration in more detail, while the PHP client repository provides the implementation and further examples.